Fullcalendar with PHP and CodeIgniter
FullCalendar is a JavaScript event Calendar that allows you to make easy customisable calendars quickly. This tutorial is going to show you how you can store events in a database and then use FullCalendar to display these events using PHP. We'll also show you how to add new events and delete old ones.
This tutorial is a continuation of our FullCalendar with PHP and CodeIgniter series. View previous parts:
- Fullcalendar with PHP and CodeIgniter (Current)
- Fullcalendar with PHP and CodeIgniter - Database Events - Part 2
- Fullcalendar with PHP and CodeIgniter - Adding Events - Part 3
- Fullcalendar with PHP and CodeIgniter - Modifying Events - Part 4
We'll be using the CodeIgniter Framework for this tutorial; since it uses a MVC architecture, it makes it very easy for us to keep our code organised. Let's setup our basic CodeIgniter files:
- application/controllers/Calendar.php
- application/models/Calendar_model.php
- application/views/calendar/index.php
- scripts/fullcalendar/*
First, grab the FullCalendar download files from their site: https://fullcalendar.io/
Unzip the file and add them to a new folder in your CodeIgniter root directory called scripts. You should then be able to access the script by going to your URL: http://www.example.com/scripts/fullcalendar/fullcalendar.min.js
If you haven't already, download CodeIgniter from their website and upload it to your site, modifying the config and database config files to include your website details and database settings respectively.
Now, let's create our skeleton files:
File: application/controllers/Controllers.php
<?php if ( ! defined('BASEPATH')) exit('No direct script access allowed');

class Calendar extends CI_Controller
{

     public function __construct() {
        Parent::__construct();
        $this->load->model("calendar_model");
    }

     public function index()
     {
          $this->load->view("calendar/index.php", array());
     }

}

?>
File: application/models/Calendar_model.php
<?php

class Calendar_Model extends CI_Model
{


}

?>
File: application/views/calendar/index.php
<!DOCTYPE html>
<html lang="en">
    <head>
        <title>Calendar Display</title>
        <link rel="stylesheet" type="text/css" href="//maxcdn.bootstrapcdn.com/bootstrap/3.3.7/css/bootstrap.min.css" />

        <script src="//ajax.googleapis.com/ajax/libs/jquery/1.10.2/jquery.min.js"></script>
    </head>
    <body>

    <div class="container">
    <div class="row">
    <div class="col-md-12">

    <h1>Caelndar</h1>


    </div>
    </div>
    </div>


<script type="text/javascript">
$(document).ready(function() {

});
</script>
    </body>
</html>
FullCalendar
Once you have all your skeleton files sorted, we can now dive into making our calendar. Let's first include our FullCalendar scripts into the view file so that we load the javascript library:
File: application/views/calendar/index.php
<link rel="stylesheet" href="<?php echo base_url() ?>scripts/fullcalendar/fullcalendar.min.css" />
               <script src="<?php echo base_url() ?>scripts/fullcalendar/lib/moment.min.js"></script>
               <script src="<?php echo base_url() ?>scripts/fullcalendar/fullcalendar.min.js"></script>
               <script src="<?php echo base_url() ?>scripts/fullcalendar/gcal.js"></script>
I like to place these scripts just after including jquery. These scripts are all included in the download for FullCalendar. The different scripts will give us different functionality that we need to make our calendar work.
Next, we need to create a Div that is going to contain our calendar:
File: application/views/calendar/index.php
<div id="calendar">
</div>
I placed mine just below the h1 tag.
Now, we need to use FullCalendar's magic; simply initialise the library on the calendar div we just made:
File: application/views/calendar/index.php
<script type="text/javascript">
$(document).ready(function() {
    $('#calendar').fullCalendar({

    });
});
</script>
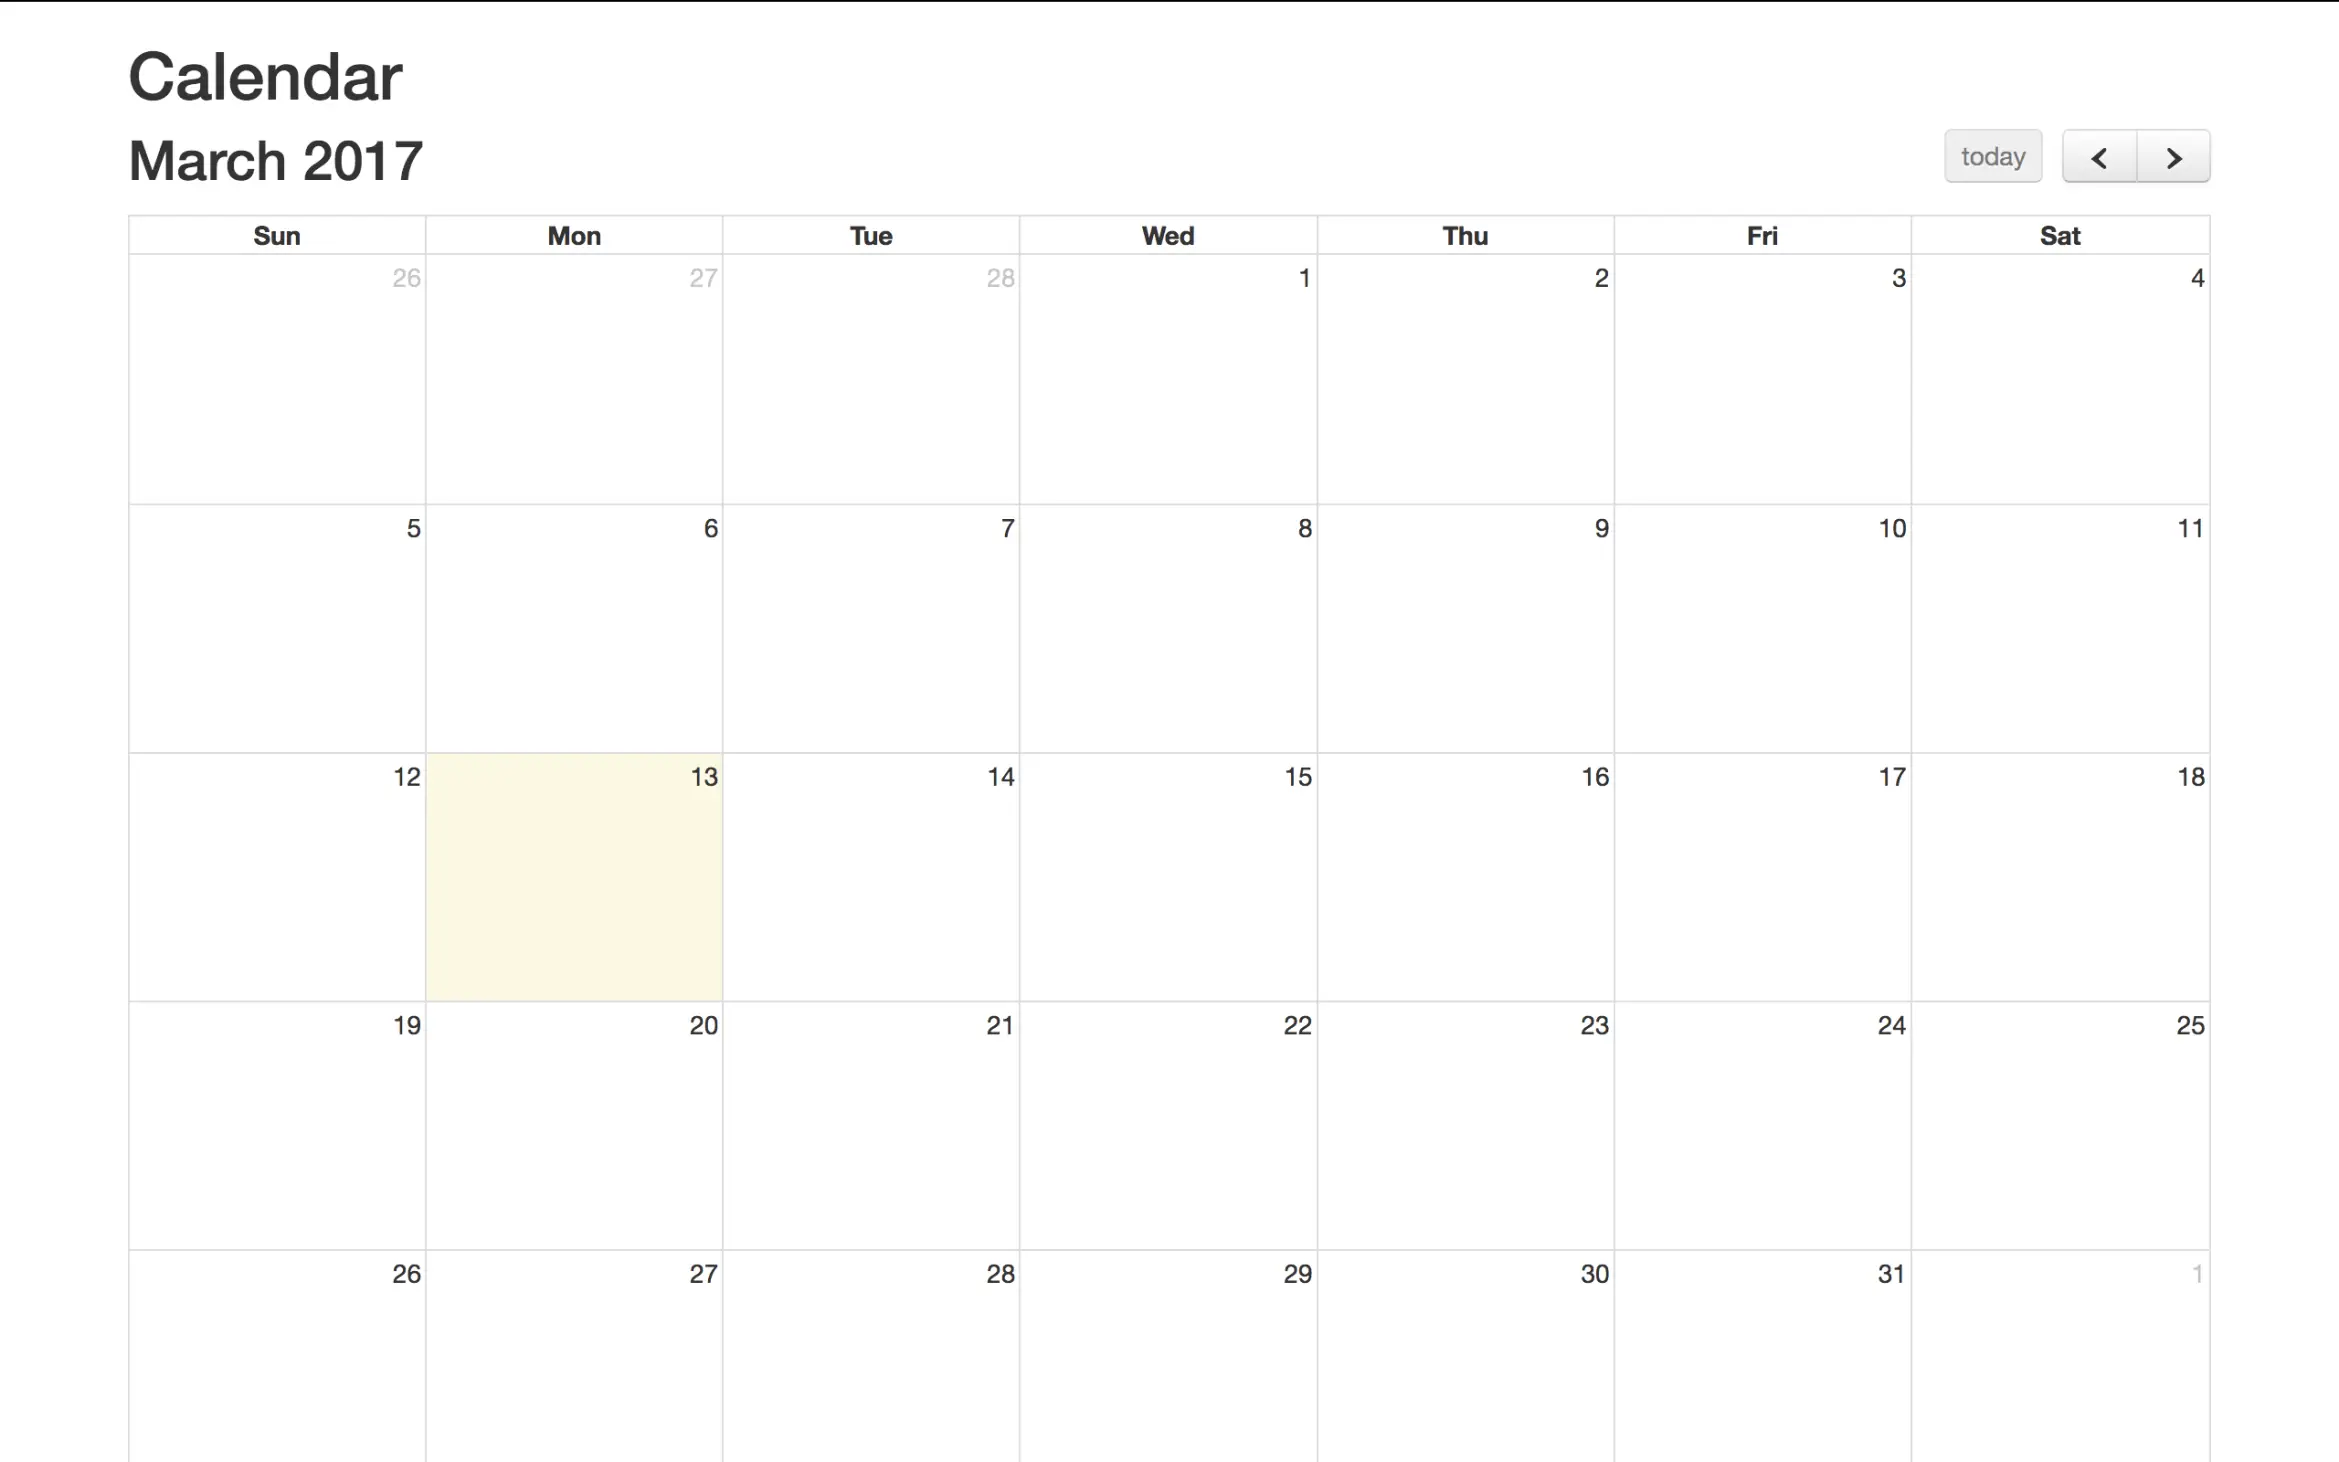
Voila! It's as simple as that to create a Calendar using FullCalendar. Your page should look something like the screenshot below:

Events
Events in FullCalendar are provided to the Calendar in the form of EventSources. Our application will eventually use a database to grab events from and then display them using AJAX. But for now, let's look at how we can add some static events using a simple Javascript array.
In our FullCalendar JavaScript code, let's add in a new EventSource:
File: application/views/calendar/index.php
$('#calendar').fullCalendar({
    eventSources: [
            {
                color: '#18b9e6',
                textColor: '#000000',
                events: []
            }
        ]
});
Here you can see we have an array of event sources (denoted by the [ square brackets ]). This allows you to add multiple sources for obtaining events. For now we'll just use one.
We have three attributes we can edit in the example above: color, textColor and events. The first two attributes effect the styling of events and can contain any HTML HEX code or name (red, blue, yellow).
The events attribute is another array. Here we can list an array of our events that will appear in the Calendar. Let's add two events:
events: [
                    {
                        title: 'Event 1',
                        start: '2017-03-13'
                    },
                    {
                        title: 'Event 2',
                        start: '2017-03-19'
                    }
                ]
Now if you refresh your calendar page, you should these two events pop up under the dates listed. If you're reading this tutorial beyond March 2017, then these events won't show up on the first page. Feel free to change the dates.
That is a simple look into events. As mentioned, we'll be using AJAX to populate our Calendar with events in the next tutorial. Resources
Tutorials | PHP Tutorials | CodeIgniter


nurfaiz
Great tutorial
Reply